Saturday, May 28, 2011

Beer Can Chicken

My husband was actually the one who wanted me to make it and he even helped a little. Anytime I can use the grill and be outside I jump at the chance. I didn't really follow a recipe for this I just mixed up my favorite spices and rubbed it all over the chicken. It is also a very simple recipe.


Get a 3 1/2 to 4lb chicken depending on how many people you plan on feeding. Wash it out and pat dry. Rub whatever spices you want on it. I used Smoked Paprika, garlic powder, onion powder, salt, pepper, thyme, and rosemary. Rub all over the chicken and use a potato to stuff the neck closed so all the steam stays in the chicken.

Use whatever beer you want and drink or pour out half. Preferably drink because otherwise that would be alcohol abuse!! I cut up some garlic cloves and threw in the can also. Place the chicken over the beer can and place on a med to high heat grill.

Cook on the grill till the internal temperature reaches around 180 degrees in the breast area.


Take Chicken off the grill and let rest for a few minutes before you cut. Beware of all the Juices and make sure you have a pan that will catch all the juices from the chicken.

Enjoy your chicken with some savory sweet corn on the grill. The chicken alone does not taste like beer it just gives it a good steam and makes the chicken so juicy and moist!

Beer Can Chicken
1-3-4lb whole chicken
Spices such as Smoked Paprika, Onion Powder, Garlic Powder, Salt, Pepper, Thyme, and Rosemary
I can of beer half full
2 cloves sliced garlic

Clean out and Rinse whole chicken, Pat Dry. Rub chicken all over with spices. Cut 2 cloves of garlic and place in half full can of beer. Place whole chicken over can of beer and place on medium high heat grill atop tin foil. Grill chicken for about 1to 1 1/2 hours or until internal temperature reaches 180 degrees. Let chicken rest for about 5 minutes before carving and serving. 

I know this picture has nothing to do with food but after we got done eating and cleaned up I had to let the dog out to do his duty and saw this beautiful sky. I love the skies in the summer they are so bright and vibrant! 

Sunday, May 22, 2011

Cinnamon Rasin Bread

I love a good rainy lazy Sunday once in awhile. It gives me a good chance and excuse to be lazy. I did a good job at it but, did get up the strength to whip up some Cinnamon Raisin Bread! As I was getting out my ingredients I noticed I did not have enough cinnamon?? I love Cinnamon and wouldn't mind putting a little extra in. But, it is lazy Sunday and I really don't want to drive to the store. So, I decided to text my neighbor who is unfortunately allergic to cinnamon and hoping that on a whim she would have some? Yes I do and don't know why? Yay for me!! So I didn't have to run to the store and can continue my lazy cinnamon bread day.


Warm milk in a saucepan till it bubbles remove from heat and cool
Dissolve yeast in warm water, and set aside until yeast is frothy. Mix in eggs, sugar, butter or margarine, salt, and raisins. Stir in cooled milk.
Add the flour gradually to make a stiff dough.

Knead dough on a lightly floured surface for a few minutes. Shape into a ball

Place in a large, greased, mixing bowl, and turn to grease the surface of the dough. 
Cover with a damp cloth. 
An Play the waiting game. do do do do do do do do do do do dodododo.............

Let it double in Size

Roll out on a lightly floured surface into a large rectangle 1/2 inch thick. 
Moisten dough with 2 tablespoons milk.

Mix together 3/4 cup sugar and 2 tablespoons cinnamon, and sprinkle mixture on top of the moistened dough.

Now for this part I may do it a little different next time. You are supposed to then roll up the dough tightly and then cut in 3 equal portion. Next time I think I will separate the dough before I roll it out. It would make it easier to roll because they wouldn't be so big.

After you cut it into 3 equal portions place in 9x13 greased pan and let rise for 1 hour.
And then bake at 350 for about 45 minutes or until your bread sounds hollow when knocked on. I only had to bake my bread for about 30 minutes.
Take out of oven and cool before slicing.


Enjoy some sweet sugary cinnamony bread slathered with melted butter.

This recipe does make enough for 3 loaves so, after I cut them into 3 I made 2 and froze the 3rd dough for a later time.

Cinnamon Raisin Bread
Yields: 3 loaves

Ingredients
  • 1 1/2 cups milk
  • 1 cup warm water (110 degrees F/45 degrees C)
  • 2 (.25 ounce) packages active dry yeast
  • 3 eggs
  • 1/2 cup white sugar
  • 1 teaspoon salt
  • 1/2 cup margarine, softened
  • 1 cup raisins
  • 8 cups all-purpose flour
  • 2 tablespoons milk
  • 3/4 cup white sugar
  • 2 tablespoons ground cinnamon
  • 2 tablespoons butter, melted

  • Warm the milk in a small saucepan until it bubbles, then remove from heat. Let cool until lukewarm.
  • Dissolve yeast in warm water, and set aside until yeast is frothy. Mix in eggs, sugar, butter or margarine, salt, and raisins. Stir in cooled milk. Add the flour gradually to make a stiff dough.

  • Knead dough on a lightly floured surface for a few minutes. Place in a large, greased, mixing bowl, and turn to grease the surface of the dough. Cover with a damp cloth. Allow to rise until doubled.

  • Roll out on a lightly floured surface into a large rectangle 1/2 inch thick. Moisten dough with 2 tablespoons milk. Mix together 3/4 cup sugar and 2 tablespoons cinnamon, and sprinkle mixture on top of the moistened dough. Roll up tightly; the roll should be about 3 inches in diameter. Cut into thirds, and tuck under ends. Place loaves into well greased 9 x 5 inch pans. Lightly grease tops of loaves. Let rise again for 1 hour.

  • Bake at 350 degrees F (175 degrees C) for 45 minutes, or until loaves are lightly browned and sound hollow when knocked. Remove loaves from pans, and brush with melted butter or margarine. Let cool before slicing.

I also just wanted to share one of my favorite tools in the kitchen from chef mate food scraper/chopper. It works wonders for clean up especially after bread making and all the flour on the counter. I just scrape it all into a pile and then I am ready to wipe off the counter!! It also has a ruler on the bottom so I used to to measure how thick my dough and roll was.

Wednesday, May 18, 2011

Butterfinger Brownies

Butter finger Blizzard from the Dairy Queen was my favorite blizzard growing up and got it all the time until one day I just had to many! Butterfingers are sweet and sticky and sooo delicious. I did eat to many of them growing up and just became sick of them but thankfully got over that so, when I found this recipe for Butterfingers brownies I just couldn't resist!! I mean brownies with a crispety, crunchety, peanut-buttery center and topping I don't see anything wrong with that!!

Look at that gooey, Crispety, Cruchety, Peanut Buttery Chocolate Brownie

First you want to melt the chocolate in a bowl 30 second spurts in the microwave
Set aside to cool slightly

In a mixing bowl mix butter, peanut butter, and Brown Sugar

Beat in Eggs and Vanilla

Mix in Melted Chocolate

Blend In Flour

Stir in Chopped Butterfingers Reserve about 3/4 cup for topping

Spread batter into tin foil lined pan and top with reserved butterfingers

Chill overnight and Enjoy!!
Look at that butterfingers right in the center of the brownie!! YUM


Butterfinger Brownies
Yeild: 25 Brownies
Adapted from Recipe Girl

4 ounces unsweetened chocolate
1/2 cup butter, softened
1/2 cup creamy peanut butter
2 cups light brown sugar
4 large eggs
2 teaspoons vanilla extract
1 cup all-purpose flour
16 (.65 ounce) Butterfinger candy bars, chopped (or just use 10.4 ounces total)

Preheat oven to 325 degrees F. Line a 9x13-inch pan with foil; grease the foil.
2. Melt chocolate in glass bowl in the microwave- short bursts of 30 seconds; stir after each burst and remove from microwave when melted and smooth. Set aside to cool slightly.
3. In a large mixing bowl, mix butter, peanut butter and brown sugar with an electric mixer. Beat in eggs and vanilla extract. Mix in melted chocolate. Blend in flour. Stir in Roughly chopped butterfingers (reserving about 3/4 cup for the top).
4. Spread batter into prepared pan. Top with reserved butterfinger chunks.
5. Bake 25 to 35 minutes. Watch closely and remove from oven when toothpick inserted into the center comes out clean. Let cool completely.
6. Refrigerate until brownies are well-chilled- if overnight, cover with plastic wrap. When ready to cut, remove from the refrigerator and turn onto a cutting board. Carefully peel off the foil and use another cutting board to flip the brownies back upright. Use a large, sharp knife to cut into squares.

Sunday, May 15, 2011

Creamy Roasted Red Pepper Dressing

Since it is almost summer and you know maybe looking to loose a few of those winter pounds I am looking for lighter recipes. I came across this salad and red pepper dressing courtesy of Cheeky Kitchen that sounded amazing and decided to give it a try. I do love salads they can be very good for you or can also be bad depending on your toppings. My only downfall is the cheese I LOVE cheese and almost any kind and can eat lots of it so, it is hard for me to put a small amount on my salad. This dressing even though it is a creamy dressing it is still very light and so simple!! It is so nice to make your own dressing because then you know what is in it.


First you want to start with your fresh ingredients. If you have a wonderful garden and can pick your peppers and basil even better!!

Next place all your ingredients in a blender. I chopped them up a bit just to make it easier

I used my trusty magic bullet and puree ingredients until very smooth

Pour your sweet creamy dressing over your salad. In my salad I used romaine, calamata olives, cooked pasta, cucumber, purple onion, and feta cheese.

I dont know about you but I love to get one of everything in my bite! I am kinda weird like that but it tastes so much better when you can blend together the sweetness of the dressing, saltiness of the olives, tanginess of the feta cheese, and the crunch of the lettuce and onion oh and chewiness of the pasta!
You could also just cook up some pasta put all the ingredients minus the lettuces and have a awesome pasta salad for a picnic.

Creamy Roasted Red Pepper Dressing

6oz Plain Greek Yogurt
2 Large Strips of Roasted Red Pepper
1/2 Shallot
1/4 Olive Oil
3 Tablespoons Honey
1/4 Tbs white vinegar
1/2 Tsp Salt
3-4 Fresh Basil Leaves

In a Blender Puree everything until very smooth. Refrigerate till use.

Friday, May 13, 2011

The New York Times Chocolate Chip Cookies

"I don't like chocolate chip cookies but these are good!" "These are the best cookies I have had" "They are so good I am going to have another one" Those are just a few comments I received from people who tried these cookies. I have made plenty of chocolate chip cookies in my day and also tried many different recipes. I don't know if it is the chilling of the dough or using cake and bread flour that make these so irresistible. The only hard part is waiting for the dough to chill and not eating it in the process! If you have people in your family that like chocolate chip cookies I would definitely recommend this recipe for The New York Times Chocolate Chip Cookies.

Just waiting to be dunked in that glass of milk


First you want to sift the dry ingredients together. Which I just have this metal strainer that I use and it works just perfect!

Using a mixer with a paddle attachment cream butter and sugars until  light and fluffy-about 5 minutes and add eggs one at a time. Stir in vanilla

Now here comes the hard part cover with plastic wrap and refrigerate for 24-36 hours

After I sat down on the couch all I could think of was the sugary chocolaty cookie dough screaming my name in the fridge. When I was growing up and made chocolate chip cookies often my mom would always yell at me for eating the dough "Your gonna get sick" Never happened so I still eat it!! MMMM

After your agonizing 24-36 hours it is time to bake them in a 350 degree oven.
The original recipe calls for bigger cookies but I just used my trusty cookie scoop and filled it full.
Also, sprinkle the dough with sea salt and bake for 10-12 minutes

As your strolling down looking waiting and drooling to see the end product I throw this picture in? 
Well Flash here was doing the same he was hoping and praying that I would drop some crumbs. Sorry buddy not this time.

TaDa and 3 days later your cookies are ready!!!

Believe me they are totally worth the wait. I used this glass of milk for my pictures and then asked my husband if he wanted some milk and cookies? No hesitancy there and I think he had to use about 5 cookies to get rid of the milk! 


New York Times Chocolate Chip Cookies
2 cups minus 2 tablespoons(8 1/2 ounces) cake flour
1 2/3 cups (8 1/2 ounces) bread flour
1 1/4 teaspoons baking soda
1 1/2 teaspoons baking powder
1 1/2 teaspoons coarse salt
2 1/2 sticks (1 1/4 cups) unsalted butter
1 1/4 cups (10 ounces) light brown sugar
1 cup plus 2 tablespoons (8 ounces) granulated sugar
2 large eggs
2 teaspoons natural vanilla extract
1 1/4 pounds bittersweet chocolate disks or fèves, at least 60 percent cacao content 
Sea salt. (I just used Nestle Milk Chocolate Chips and it was delicious)
  • Sift flours, baking soda, baking powder and salt into a bowl. Set aside.
  • Using a mixer fitted with paddle attachment, cream butter and sugars together until very light, about 5 minutes. Add eggs, one at a time, mixing well after each addition. Stir in the vanilla. Reduce speed to low, add dry ingredients and mix until just combined, 5 to 10 seconds. Drop chocolate pieces in and incorporate them without breaking them. Press plastic wrap against dough and refrigerate for 24 to 36 hours. Dough may be used in batches, and can be refrigerated for up to 72 hours.
  • When ready to bake, preheat oven to 350 degrees. Line a baking sheet with parchment paper or a nonstick baking mat. Set aside.
  • Scoop  mounds of dough (the size of generous golf balls) onto baking sheet cookie. Sprinkle lightly with sea salt and bake until golden brown but still soft, 18 to 20 minutes (or 10-12 if making smaller cookies) Transfer cookies to a wire rack for 10 minutes. Repeat with remaining dough, or reserve dough, refrigerated, for baking remaining batches the next day. Eat warm, with a BIG glass of milk.
  • Yield: 1 1/2 dozen 5-inch cookies.
I also just bought this chalk board cookie jar at Pier1  so I can change the name on the outside so everyone knows what kind of cookies are in the jar. 

Tuesday, May 10, 2011

Roasted Garlic Hummus

I can honestly say I have never made hummus before and only tried it a few times. I feel like recently it has become a very popular item. I am always looking for something that is healthy and low fat and this is both of that. It is actually a very versatile dip which you can use veggies, crackers or spread on a sandwich. It is also a very easy and simple recipe.


Roasted Garlic Hummus
Adapted from  eating well
Ingredients
1 head garlic
  • 1 19-ounce can chickpeas, rinsed, or 2 cups cooked chickpeas
  • 2 tablespoons lemon juice
  • 1 tablespoon reduced-sodium soy sauce
  • 1 tablespoon tahini, (sesame paste)
  • 2 tablespoons water
  • 2 tablespoons chopped fresh parsley, plus a sprig for garnish
  • Salt, to taste
  • Paprika, for garnish

Directions
Preheat oven to 425°F. Remove the loose papery outside skin from the garlic head without separating the cloves. Slice off the top 1/2 inch. Wrap in a small square of foil and roast until the garlic is very soft, about 40 minutes. Unwrap and cool slightly. Separate the cloves and peel.
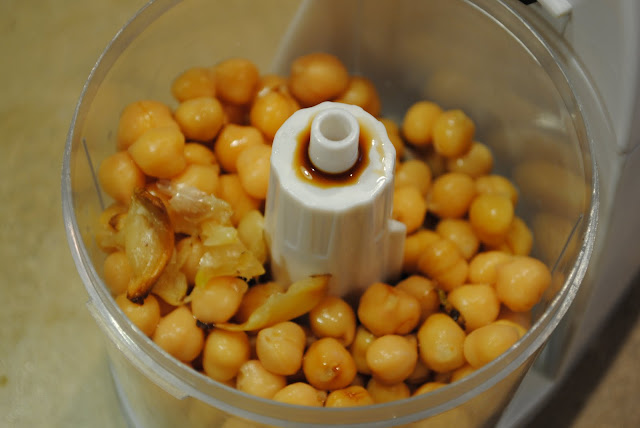
Puree the garlic, chickpeas, lemon juice, soy sauce, tahini and water in a food processor. Add more or less water as necessary to make a fairly firm dip. (I did not use tahini because I didn't have any)


Transfer to a small serving bowl, stir in parsley and season with salt. Garnish with a sprig of parsley and a sprinkling of paprika.